Sunday, April 21, 2013

On Juicing

When I was sick a couple of weeks ago I began juicing.

Here's what I already knew:
~ Americans, myself included, do not eat nearly enough raw organic vegetables and fruit.
~ Juicing was a sure way to get plenty of nutrients into my body, especially when I had no appetite.

About a year ago I rescued a Jack LaLanne juicer from sitting in my grandparents garage.  I had used it for a while only for it to end up in my own garage.  So when this occurred to me a few weeks ago I pulled it out and began experimenting.

Costco is a great place to get organic veggies in large quantities at a good price.
To my pleasant surprise my kids actually enjoyed many of the juices I had made.  Juicing was getting more vitamins and nutrients into them than I ever could by serving them raw veggies.  (The only raw veggies they'll eat is cucumber and the occasional broccoli and lettuce.)
Then I decided to watch a movie about juicing I had heard about: Fat, Sick, and Nearly Dead.  Very eye opening!  I also did a little online research on the subject.

Here's what I learned:
~ There is enough protein, iron, and other nutrients in vegetables and fruit alone to sustain our bodies.
~ You can juice so many things I never imagined... Like asparagus, sweet potatoes, and collard greens... Three of my favorites!
~ If the pulp you get after the initial juicing feels wet you can put it back into the juicer and get more juice out of it.  With my juicer I find with hard veggies it's not worth the hassle, but with leaves I get a good amount of juice from the pulp.

The Jack LaLanne Juicer is by no means the best one out there, but it's doing the job for now.  I really want to get a good one when I have the funds!

I didn't look up any recipes, I just experimented until I found some combinations that I liked.

Here are some things to use sparingly or avoid completely unless you're brave.  (I was juicing whatever vegetables I had on hand so I learned this the hard way.):
~ Swiss Chard
~ Radishes
~ Endive
~ Arugula


Here are some of my Favorite Recipes:
(Most vegetable juice without a piece of fruit is still unbearable to me, but I only use one fruit or less each time I juice.)

Cucumber Mint (I'm thinking watermelon would go wonderfully in this if you wanted to add fruit)
~ 2 cucumbers
~ About 5 sprigs of mint leaves

Collard greens (surprisingly good!)
~ 5 collard green leaves
~ 1 cucumber
~ 1 apple
~ piece of ginger (I love the flavor, but start off in small pieces so it's not too overwhelming!)

Salad
~ head Romain Lettuce
~ about a cup Spinach (optional)
~ 1 cucumber
~ 1 green apple

Asparagus (another surprising favorite!)
~ 5 asparagus
~ 2 carrots
~ 1/2 head Romain lettuce
~ 1/2 cucumber

Orange Juice (My most favorite!)
~ 1 orange*
~ 5 carrots
~ 1 sweet potato (peeled)
~ piece ginger (or sprinkle some on top)
~ 1 tablespoon apple cider vinegar

*You can juice the orange on a citrus juicer if you have one.  Since I don't want to dirty another appliance I just cut the peel off leaving the orange intact. A little pith on the orange is okay, but if you leave too much white it may be bitter.

I have yet to do a juice fast (drinking ONLY juice for a number of days).  But I substitute juice for a meal about once a day.

If you have a juicer please try some of my recipes, and share some of your favorites!

Saturday, March 30, 2013

Last Minute Easter

I had big plans for this Easter.  However I ended up getting sick last Friday, started feeling better Monday only to feel worse than ever Tuesday.  It turns out the cold I had turned into a sinus infection.  I've never had one before, but it is AWFUL!  I've never been sick this long in my life!  I'm still recovering despite all the home remedies and juicing (which I've become obsessed with and will probably post about later).  I resorted to prescription meds a couple days ago, but I still haven't had a night of sleep without waking myself multiple times from the incessant cough.

My poor kids were stuck at home with me all week, and probably watched 10 hours of TV more than they should have.  And I didn't accomplish any of my Easter plans.

This morning was the first I didn't feel completely horrible.  I took the kids to CVS to use up some ECB's.  The egg dying kits were already on sale so I let them each pick one: Spiderman and Disney Princess.  We went over to my grandma's, and they played outside while I boiled a dozen eggs.  Grandma helped us dye our eggs. 


We came home and had our eggs for lunch... No Easter egg hunt, just egg salad sandwiches. (It's all about the egg dying experience anyways, right?)  I had some plastic eggs and candy stored away for an Easter egg hunt tomorrow anyway. 

Tomorrow we're going to our church, The Cross, at 10 where my grandpa will be the guest speaker.
Then at 4 we'll be at my brother-in-law's church, City Peace Project, where I'll be helping in the childcare.

So we won't even be having a proper Easter meal tomorrow, but at some point in between I'll hide some plastic eggs in the backyard for the kids.

So on the way home from Grandma's house we stopped at the store to pickup some goods for the one things I absolutely wanted to try for Easter: Resurrection Buns!
I had seen a bunch of recipes for these on Pinterest, and they looked so delicious I'd been thinking about them for weeks!
Here's what I did:
Ingredients:
- refrigerated dough (biscuits or the like)
- large marshmallows
- cinnamon sugar (I mixed about 3/4 cu sugar with 3 TBS of cinnamon)
- melted butter (I used 1 stick)

Here's the dough I used, and I was very pleased with my choice... Especially because they were on sale for $.99 at Safeway (with Just 4 U coupon).

I peeled the biscuits apart in the middle so they were half as thick and let Naomi flatten them a little.
She took a marshmallow, dipped it in butter, then in the sugar mixture.  Then placed it on the dough.  I then wrapped the marshmallow, pinching the edges together.  Then I dipped the whole thing in butter and sugar... (sounds healthy, right?)... and placed it on a baking sheet.

As we assembled the buns we talked about the metaphor.  Jesus, because he was without sin, was the pure white marshmallow.  The butter and sugar were the spices and perfumes prepared for Jesus at his burial.  And the dough was the linens he was wrapped in.  After baking, the bun represents the tomb.  And if all goes well when cut open the marshmallow will have disappeared and the tomb will be empty!

There were 8 biscuits in the can so this made 16 buns.  I baked them at the recommended 350 for 15 minutes.  At first glance I thought this was a Pinterest fail because the whole baking sheet was covered in carmalized marshmallows and some of the buns had holes in them.  But it turned out most of them looked great. Some of the marshmallow goo had just oozed out onto the pan.  Even the not-so-pretty buns were even more delicious than I had imagined!  Definitely a new Easter tradition for this family!

Upon cutting them open we found that indeed the tomb was empty!  Naomi understood the metaphor, but she still needed and explanation of what happened to the marshmallows.  Her theory... "The angels ate them."

"He is not here, but He has risen." Luke 6:24

Also, if you're looking for Easter ideas for next year I can't help but share this post from my friend's blog... She planted grass in an Easter basket and took pictures with her bunny in it! So cute! She also has a post about live chick pictures!

Friday, March 22, 2013

Meals for New Moms

When Judah was born our church meals ministry provided dinner every night for 2 straight weeks.  Other friends and family provided meals for us as well.  It was the biggest blessing to me!  My friend told me about Meal Train which is an easy way to organize meals for someone. So I joined the meals ministry and told them about Meal Train. 

Ever since then I'm always looking for good recipes to bring friends an family after they have a new baby.  The last few friends who have gotten meals from me have asked me for recipes so I figured I post it here, and maybe it will help someone bless someone else with a meal!

Tips for dropping off meals:
- Try not to use anything they'll have to return.  If it's a really close friend or neighbor I might use one of my Pyrex dishes, but otherwise I try to buy aluminum foil pans and use mason jars for sauces or dressings.  That way the new mama doesn't have to worry about making sure you get your dishes back.
- While you're making the meal, make a separate one for your own family.  This way after you drop off the meal you can come home and sit down to a nice dinner with your own family.
- If you're not on Meal Train be sure to ask ahead about any allergies or food preferences.
- Include instructions - If they'll have to bake or do any preparations just include a sticky note with simple instructions.

Meal #1 - White Pizza & Apple Gorgonzola Salad
Here's the recipe I used for the pizza.  I like Trader Joe's pizza dough so that's what I used for ours, but my pizzas always come out oddly shaped so rather than dropping off a misshapen pizza to my friend, I used a Boboli thin crust for hers.  Also, my husband is not fond of white sauce so for us I made 2 pizzas.  I used the same ingredients for both, but I put white sauce on mine and BBQ sauce on his.


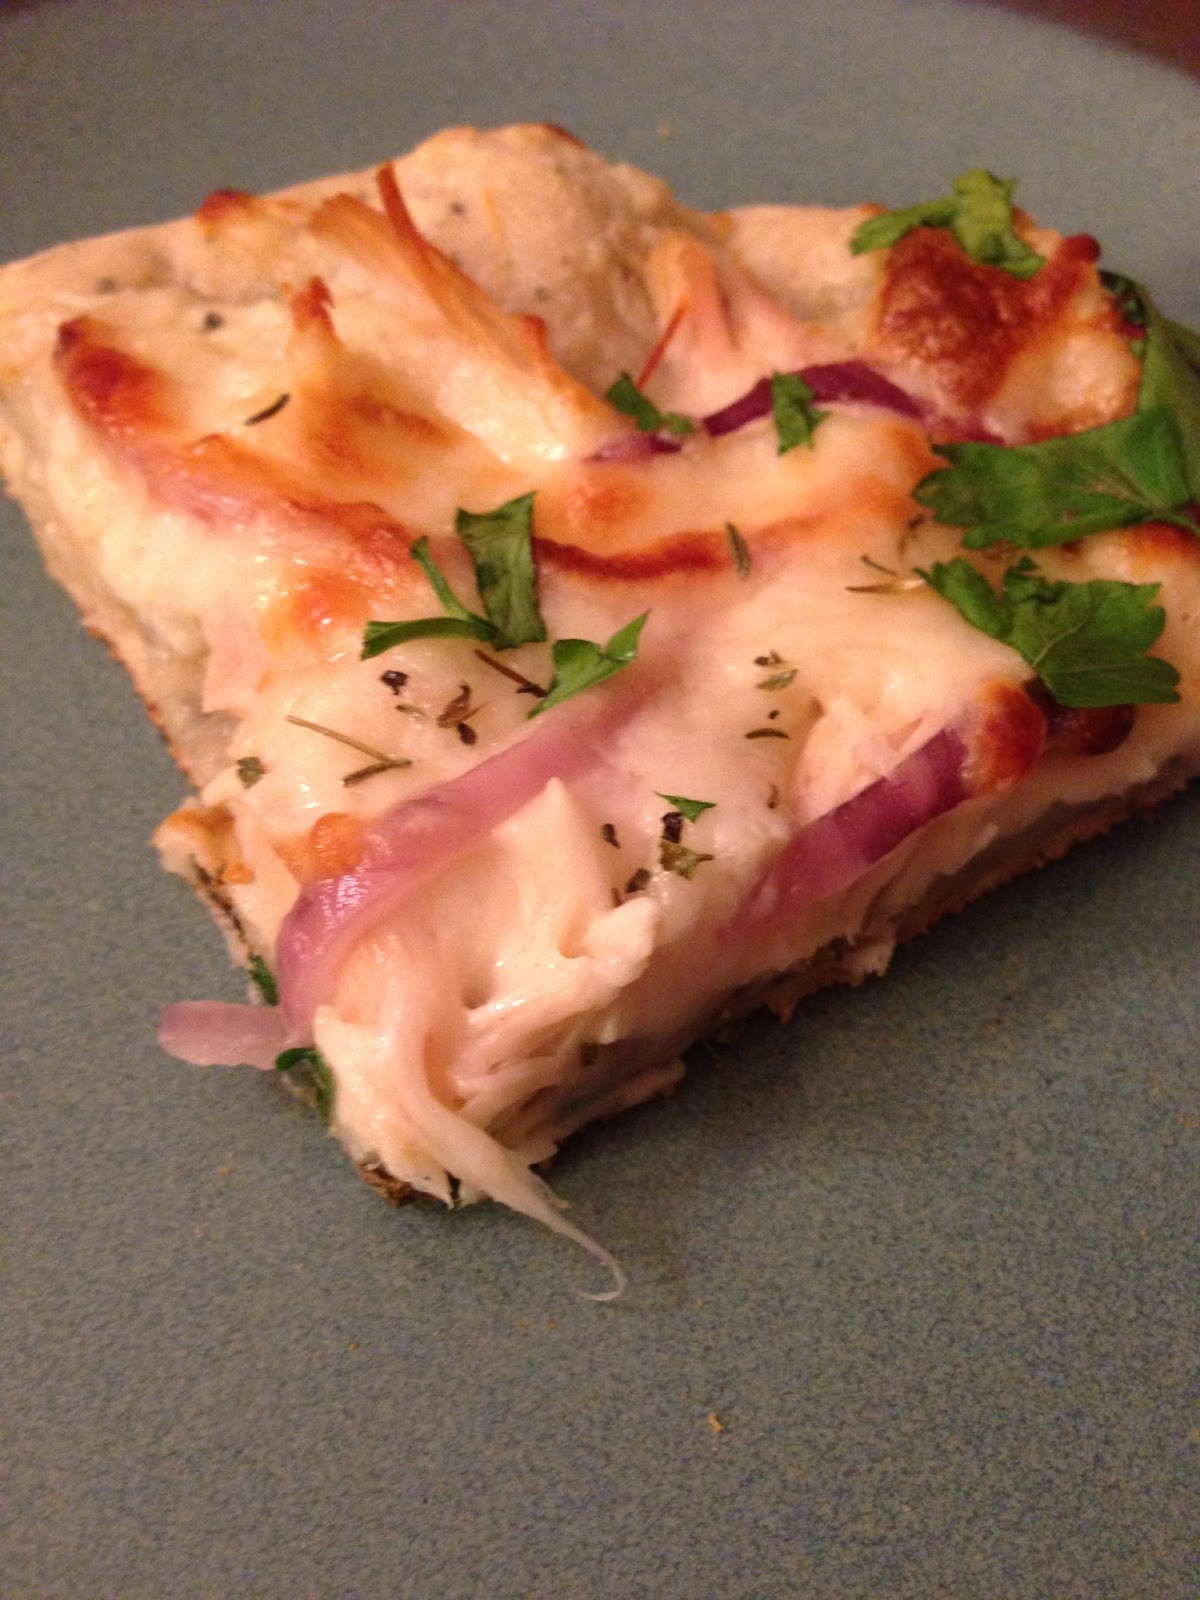
My slice of white pizza
For the salad and homemade dressing I used this recipe.  I used the Applewood smoked bacon from Trader Joe's.  (Rather than cooking bacon in the frying pan I cook it in the oven! Place the bacon on a foil-lined baking sheet; place in the oven THEN turn the oven on to 400.  Bake about 20 minutes.)  And I think gorgonzola is a much better choice than feta for this salad so that's what I used.  I followed the dressing recipe exactly, but if I were to do it again I would probably cut the amount of sugar in half because it was really sweet, and that's just a lot of sugar.
 
Overall this is probably one of my new favorite salads of all time!

Meal #2 - Green Enchilada Pie and Mexican Rice
The Green Enchilada Pie is my own recipe I kind of made up by trial and error.  I've never written it down, and I don't measure anything so you'll have to use your judgment when making it.  It's super simple and yummy though!
Please use Las Palmas green enchilada sauce... It's the only respectable store bought enchilada sauce in my opinion!
1) Pour *some* sauce on the bottom of a 13x9 pan... Enough to coat the bottom.  (If you get a large can of sauce you will have PLENTY so don't worry that you're going to run out.) 
2) Next I use Guerrero white corn tortillas.  You can lightly spread butter or oil over them on each side.  Then I cut them into quarters and cover the bottom of the pan with them. 
3) Next layer in your chicken (I like using a Costco rotisserie chicken, but if I don't have one on hand I just boil a couple chicken breasts and shred them.) 
4) You can add whatever you like here.  I top the chicken with frozen white corn, chopped green onions and sliced olives. 
5) Pour *some more* sauce over the chicken mixture.  Then top with cheese... I'm pretty sure you can't have too much cheese.  Use Monterey Jack or a Mexican Blend. 
6) Then cover with more buttered, quartered tortillas. 
7) *More sauce* *More cheese*  And you're ready to bake it! 
8) 425 for 20 minutes should do. 

(For red enchiladas substitute red for the green sauce, and I like to use ground beef instead of chicken. )

The rice recipe I learned from my sister who I'm pretty sure learned it from my dad's girlfriend who is pretty much the master at making it.  But I'll do my best to transcribe it, at least the way I've been making it the past few years.

2 cu rice
2 tbs oil  canola or vegetable will do just fine
*garlic, onion* (If I don't have them or am worried about time I just add dried onion with the seasoning instead)
4 cu water
1 (8 oz) can tomato sauce
2 tsp Cumin*
3 tbs Chicken Flavor Bullion*
1/2 tsp Salt*
Pepper - just grind a little in there*
sprinkle in some dried onions if you haven't already used fresh*
* Sorry for the guesstimates... I will try to measure next time I make it and update with more accurate measurements.
(Usually I cut this recipe in half if I'm making it just for my family.  So if I'm making it for another family I'll do the full recipe and each family can have half!)

Lightly brown the rice in oil. Add *some* chopped onion and garlic if you please.
Add water and tomato sauce.
Mix in seasoning
Bring to a boil
Reduce heat to low and cover
Simmer about 30 min - Stirring and scraping the bottom just once about halfway through

This stuff can be found in the Mexican section of most grocery stores - Basically this along with the cumin are the secret to the rice.

Meal #3 - Chicken Fajitas with Avocado Dressing,  Rice & Beans, and Cookies

Here's the recipe for oven baked chicken fajitas.  I've made this a couple times, and really like it.

Same rice recipe as above.

For the beans I just used the instructions on the bag of dry pinto beans.  Since they take at least a few hours to make I made them the day before and had them ready in the fridge.  I just put them in a 8x8 foil pan and put them in the oven while the chicken was cooking.  That way they were hot and ready when I dropped them off.

This Avocado Dressing is a Pinterest gem... I make it every time I make chicken tacos or the like.

And my chocolate chip cookie recipe is a favorite from Betty Crocker.  I skip the nuts.  And try to set the butter and egg out ahead of time so it's room temperature when you bake. 

Note: I make dessert first and set it aside so that it's cooled down and the meal is hot when I deliver it.

Wednesday, March 13, 2013

Turn an Old Sweater into an Updated Cardigan

I bought a black and white striped sweater a few years ago, but after wearing it when I was pregnant with Judah it just never fit right again.
Here I am in the sweater just weeks before Judah arrived

I don't know why I just didn't want to let it go so it hung in my closet for quite some time.  Until finally I decided to cut it down the middle and turn it into a cardigan. This was the most simple project and an easy way to update a shirt or sweater in your closet.

Just cut the sweater down the middle.

If you're really savvy you can sew the edges, but I just used my nifty iron-on seam tape.


The rest is up to your creativity. I added contrasting elbow patches and a button.  (There's no buttonhole; the button is purely aesthetic.)


Wednesday, February 27, 2013

Produce Boxes & Kale Chips

I haven't ordered a produce box in about a year.  I really liked it before, but I cancelled ours before we moved and just hadn't gotten around to signing up again.  I love the variety of vegetables you get, some of which I had never seen before.  For instance, today I got this awesome looking Green Romanesco.

My friend recently told me about her produce delivery service so I decided to give it a try again.  It's Farm Fresh to You.  I got my first box for $15 from Groupon and signed up for the Regular mixed (veggies and fruit) box @ $31.50 every other week.  So it's not the cheapest produce, but it's fresh, organic, delivered to your door, and you're supporting local farmers.

In today's box I also received 1 bunch of Dinosaur Kale.  I figured Dinosaur Kale Chips would be the perfect accompaniment for the kids Dinosaur chicken nuggets lunch. 

Guess what... They liked the kale more than the nuggets.  Anytime you have kids asking for more kale that's a good thing!
I've made kale chips before, but not in a while.  So here is my process:
 

Rinse and dry the kale. By the way, you can use any kind of kale, doesn't have to be dinosaur.
Cut off the stems.  I also cut out the middle vein.  And chop it to chip size.

Toss the kale with oil and seasonings of your choice.
Today I used olive oil with garlic salt and lemon pepper.  In the past I've done different combos using kosher salt, pepper, chili flakes, lemon....  But I like to save the lemon for last.
Make sure the oil is evenly distributed amongst the kale.

Spread it on a baking sheet

Bake at 400 for 10 mins.  Until it's crispy.  Different varieties of kale may take different amount of time.

Ready for the best part?!

Sprinkle with freshly grated parmesan and freshly squeezed lemon.  (I do this for pretty much any vegetables I roast.)  This is what makes them melt-in-your-mouth fantastic!


Enjoy! *Warning: They go fast!*

Tuesday, February 19, 2013

Lipstick Saga

I NEVER wear lipstick.  I've always just worn lip gloss or tinted lip balm, etc.  A couple weeks ago we went to Valley Fair on Friday night.  MAC was having a launch event for their new, limited edition line, Archie's Girls.  Naomi saw people getting their makeup done and wanted to do it too.  We each tried on a lipstick.  I tried on "Daddy's Little Girl," and she tried on "Girl Next Door."
(MAC)
(MAC)


I instantly LOVED the lipstick I had on.  I showed Pete and we decided I NEEDED to buy it.  Sadly, when I went to buy it they were already sold out.  I was sooooo disappointed that I had finally fallen in love with a lipstick that was now unobtainable.  That night Pete secretly called around looking for it.  The next day was my 5K.  Afterwards we went to Eastridge where they had supposedly put one on hold for him.  He ran in while the kids and I waited in the car.  He was so excited to give it to me when he came out.  But when I looked at it, it was "Girl Next Door!"  I didn't want to spend $18 on a color I wasn't in love with so I had to tell him it was the wrong one.  I returned it, and we both went home heartbroken.  Suddenly we were on a quest to find "Daddy's Little Girl."  I was bidding for it on ebay and calling all the stores.  I was obsessed!  At church the next day I told Pete I seriously just needed to let go of it... It's just a lipstick after all!  So I went to Target and bought a Revlon lipstick for $4.99. 

My friend had told me she had a Mac lipstick similar to "Daddy's Little Girl" called "Up the Amp."  So when I realized the Revlon color I bought, "Berry Haute," was the dupe for "Up the Amp"  I was pretty satisfied.  Then Pete surprised me with another limited edition Mac lipstick "Seductive Intent" which was another very close match.  But since I was happy with my $5 dupe I decided to return that one as well... My poor husband just couldn't get it right, but I so appreciated his effort!
Revlon "Berry Haute" & MAC "Seductive Intent"


Yesterday I got a coupon from CVS Beauty in my email for $3 off any Revlon product.  I wanted to try the dupe for Mac "Snob" so I picked up Revlon "Pink Pout," and I LOVE it!
(Found this pic on this cute blog makeupandmacaroons.com)
The Revlon lipsticks in general work pretty well for the price... I'm a satisfied customer, and I'm just glad this whole lipstick saga is over!

Thursday, February 14, 2013

Valentine's Day ~ DIY Lip Scrub

My husband and my BFF share a birthday that happens to be the day before Valentine's Day.  My BFF recently moved back to California after years away, and we are so happy to live in the same area again!  We celebrated both hers and my Husband's birthday last night at our favorite Chinese restaurant, Taiwan, in Willow Glen.

Me and my hunny
My gorgeous friends and me, birthday girl in the middle


I wore lipstick last night and noticed my lips weren't quite as smooth as they should be.  I've been wanting to try a lip scrub, one I could use on my daughter as well because her lips have been pretty chapped lately.  So this morning I thought, what better day than Valentine's Day to make a lip scrub to give me soft, (kissable), lipstick ready lips?!

I had some baby food jars I'd been wanting to repurpose so I decided to use those for the scrub.  I had peeled the stickers off, but there was still sticky residue on them.  So I filled the jars with hot water. This makes the sticky stuff a little easier to get off.  Then I just used a sponge with a dab of olive oil to rub it right off!


before


after


I painted the lids with chalkboard paint.


I have seen several different recipes for DIY lip scrub so I concocted a few different recipes using these ingredients:


I didn't like the clumpy-ness of the brown sugar nor the runniness and strong taste of the olive oil so here's my final recipe:
2 Tbs Coconut oil
2 Tbs Granulated sugar
1 Tbs Honey

  1. My coconut oil was pretty firm so I just put it in the jar in a bowl of hot water until it was soft enough to stir.

     2.  Next just stir all the ingredients together and your scrub is ready to use!

     3. Use your finger to scrub your lips with it.
     4. Wet a washcloth with warm water, and wipe off your lips.
     5. Apply some kind of lip moisturizer.
     6. Enjoy the silky smoothness of your lips!

And now your lips are smooth enough for lipstick too!